

SavvyCAN developed by Collin Kidder is the best open-source cost per channel software tool for CAN bus sniffing i’ve found. It is just as powerful as many of the paid CANalyzer tools on the market and it’s very easy to get up and going and it even supports multiple CAN bus channels (3 or more I think?) on multiple OS types (OSX, Linux, Windows).
SavvyCAN was originally developed for Arduino DUE platforms including the EVTVDue and CANDue hardware and will also work with the Macchina M2, Teensy 3.x boards, PeakCAN, Vector, and other socketCAN compatible devices. Collin’s firmware is called GVRET (Generalized Electric Vehicle Reverse Engineering Tool) which is targeted for Arduino DUE based hw platforms on the EVTV website
The Togglebit Dual CAN Kit and the CANShield for Arduino DUE can also be used for bus sniffing on the two native CAN busses that exist on the SAM3X8E processor of the Arduino DUE using SavvyCAN and the GVRET firmware. Below are the steps that can get you up and going:
Step 1 – Build & Verify
Build your shield and test it with your Arduino DUE to make sure both CAN busses are working properly following the how-to steps.
Step 2 – Program it with GVRET firmware


The easiest way to do this is to use the firmware updater which doesn’t require you to do a build or even have the Arduino IDE installed, you can download that here: https://www.savvycan.com/GVRETupdate.zip. You’ll want to plug the USB into the port labeled “Native USB” of the Arduino DUE and run the batch file “GVRETupdate.bat”. The batch file should detect the COMM port the Arduino is connected to, list it to the screen, prompt you for keyboard input to continue then flash the DUE with the firmware.
Step 3 – Get SavvyCAN
Download SavvyCAN from Collin’s SavvyCAN page. Unzip it and run the executable SavvyCAN.exe
Step 4 – Connect to Arduino DUE
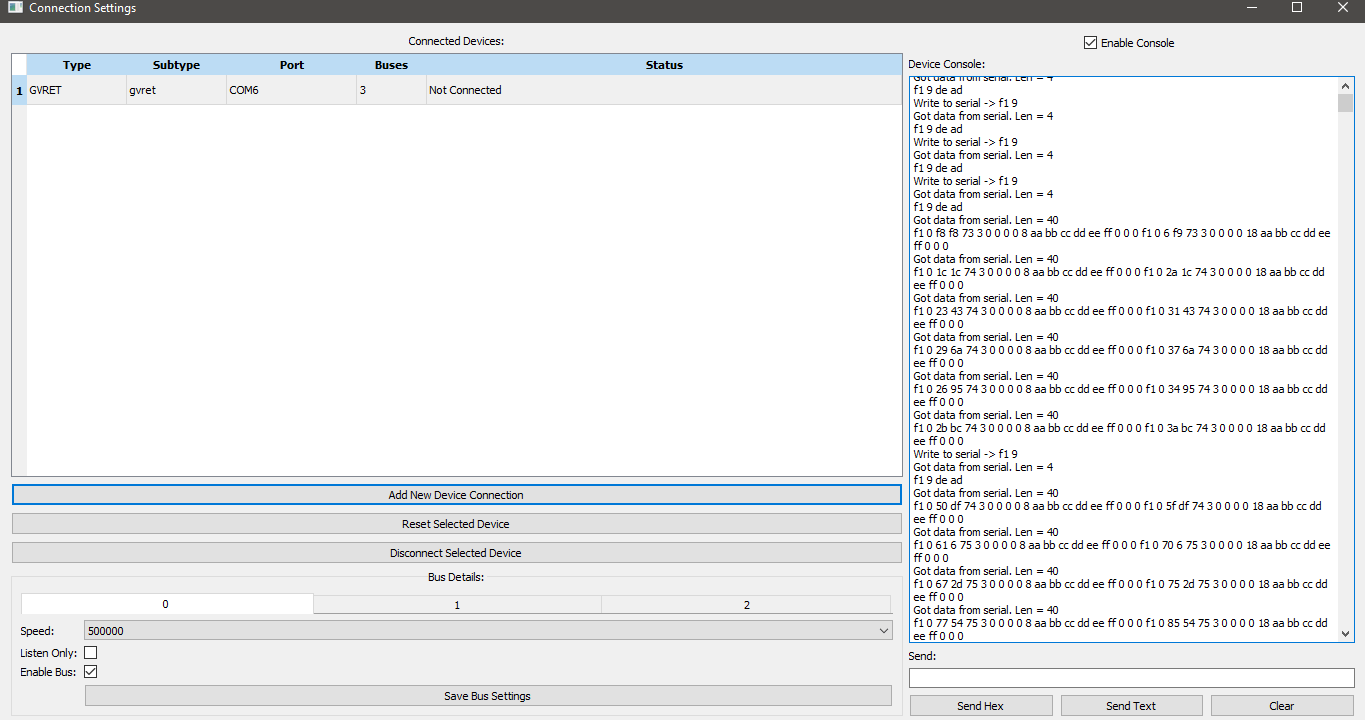

With the DUE connected over USB to the Native USB port, Go to Connection->Open Connection Window. Click the “Add New Device Connection” select “Serial Connection” and select the serial port that the DUE is connected to. Once it appears in the connected devices list as “GVRET” double click the status and on the right hand side tick the box that says “enable console“. You should see messages confirming data going out to the DUE and from the DUE over the serial port. At the bottom of the screen you should see two busses available click the box that says “enable bus” for port 0 and for port 1. For this entire process, it might take a shut-down and restart of SavvyCAN or even a reset and re-plugging in of the DUE USB port before you get a connection going on your first try.
Step 5 – Start Sniffing a Bus
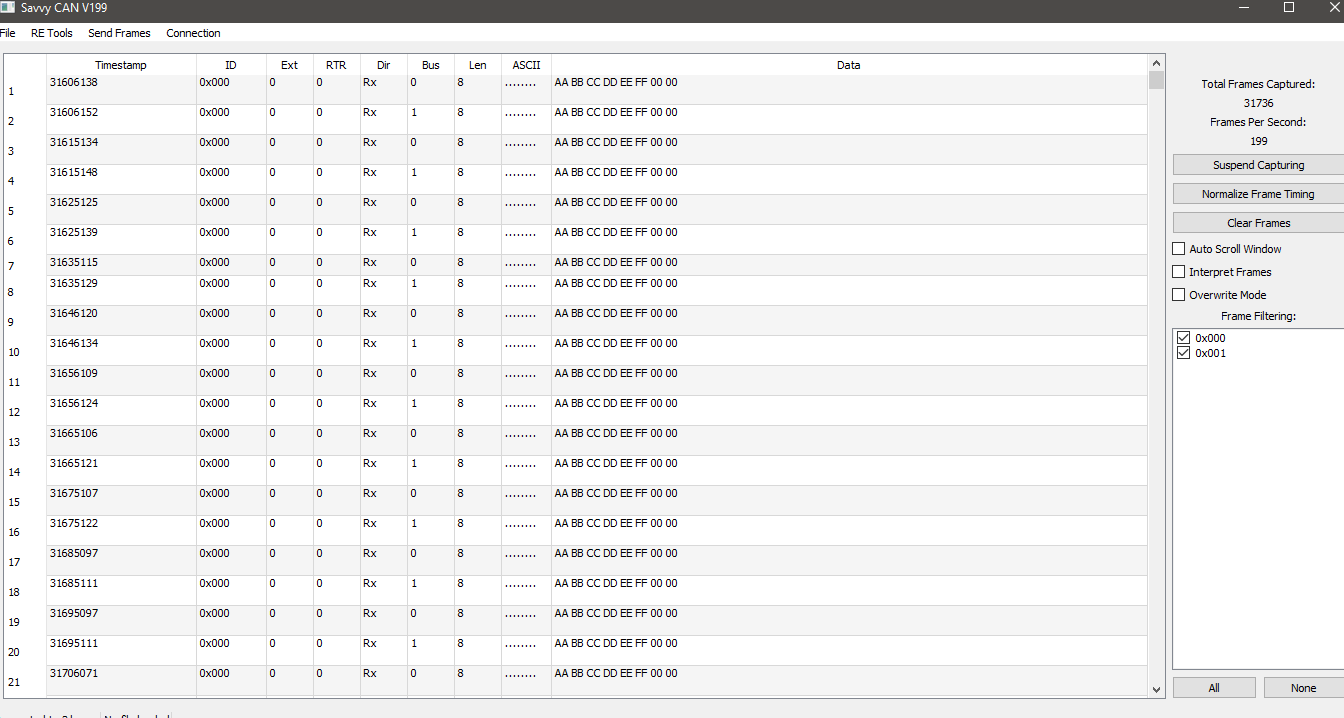
Ok now that we are connected time to connect to your CAN bus(s) and start sniffing. Remember you’ll want to understand where the terminations are and observe proper wiring in your network and if you need to enable one on your CANShield for Arduino DUE or not. You should now see traffic in the main window and the source of that traffic (CAN 0 or CAN 1). Really huge props to Collin Kidder for developing such a powerful tool for the community!


